
Getting started with 2D Terrain Zone
To create a new terrain select Game Object > 2D Object > Terrain. Once created you can edit the terrain in the inspector. Initially the terrain will be empty.
Setting up a material
When a terrain is created it will have a default material. If you want to create your own material you will need to use a shader that has the textures _TexR, _TexG, _TexB, _TexA. There are 3 suitable shaders, 2D > Terrain, 2D > Terrain Textured Edge, and 2D > Outline. The textures need to be set up in the shader before they will show up in the inspector.
Each of these shaders has an option for lighting, which can be either normal, toon or flat.
You also have the option of setting up a material for the details. By default the details material uses the Terrain Detail shader found in 2D > Terrain Detail. This shader uses the stencil buffer to only draw on top of the terrain. If this effect is not desired you can use any sprite shader, or use the Waving Sprite shader to add wind to your details.
Using Terrain Textured Edge Shader
The terrain textured edge shader is an advanced edge shader, in which you can define up to four different textured edges, and up to four different textures which can have a bottom edge and a top edge defined. In the material inspector for each edge there will be an option for top edge and bottom edge which can be none, one, two, three, or four.
For each edge you can define the texture and tiling, a width, and give it a wind amount to work with the 2D wind engine.
Add/Remove Terrain Tool
With the Add/Remove Terrain Tool selected you can paint terrain directaly to the scene by Left Clicking in the Scene View. Hold shift to remove terrian.
You can select a brush and texture in the inspector, and also choose the brush strength, angle and size.
The brush strength isn't too useful in Add/Remove mode unless you are using a semi-transparent brush.
You can add in custom brushes by clicking on Add Texture to the right of the brushes (you might need to scroll), and then dragging in a texture to the new box.
Curve Tool
The Curve Tool lets you modify the terrain using a Curve2D object. You can create a Curve2D object by selecting Game Object > 2D Object > Curve. Once you have a curve selected you can click either Add, Subtract or Texture to modify the terrain with the curve.
Paint Texture Tool
The paint texture tool is used for painting a texture on to the terrain without modifying the mesh. You can use the same tools and brushes as the Add/Remove Terrain Tool.
Details Tool
With the Details Tool you can paint details on to the terrain. The brush strength controlls the density of the details drawn. Before you can add any details you must add at least one detail texture by clicking Add Texture in the box under Details.
Brush Dynamics
In the brush settings you can choose a brush dynamic or draw with no dynamics. You can choose one of the exsisting dynamics or create your own. To create a new brush dynamic select Assets > Create > Brush Dynamic. The brush dynamic has the following settings:
- Fade Type: Either based on time(seconds) or distance(units).
- Repeat Type: None: Don't repeat, Loop: Cyclic Loop, PingPong: Reverses every 2nd loop.
- Fade Distance: Time in seconds for a cycle if the Fade Type is seconds, otherwise Distance in units for a cycle.
- Strength, Size and Angle: Curves to modify the valuse. The horizontal axis is time/distance and is a value between 0 and 1, the vertical axis is a multiplyer for the value at that point in the cycle. Strength and Size are multiplyed by the value, but the value is added to the Angle.
- Random Strength, Random Size, and Random Angle: Curves to describe the start multiplyers. When a stroke is started the curve is sampled at a uniformly random position along the horizontal axis between 0 and 1.
Also you can script your own brush dynamic. To create a brush dynamic script you must create a script that derives from BrushDynamicBase and override the method GetDynamic( float timeDown, float distanceDown, out float brushStrength, out float brushSize, out float brushAngle ).
For an example of this look at BrushDynamic.cs.
Settings
- Material and Details Material: The material used for the terrain and details.
- Update 2D Colliders: If checked a 2D Polygon collider will automatically be generated.
- Update 3D Walls: Adds 3D walls to the edges. This can be used for collision detection if you are not using the 2D physics engine, and also for casting shadows on background objects. This is required for the Textured Edge Shader to work as the walls are the actual edges that have just been manipulated in the shader.
- Normal Influence: How much the normals pop out to give a 3D effect. This needs to be greater than 0 for the Textured Edge shader to work.
- Sorting Layer and Sorting order: Required if you want to show in front of sprites.
- Detail Settings: For each different texture used in the detail sprites you can set additional settings explained in the next section.
- Clear Details: Clears all the details and removes the GameObject responsible for rendering them.
- Clear: Clears the whole terrain including all details. The terrain must be clear to modify any of the following settings.
- Chunk Width and Chunk Height: the size of each chunk in grid units.
- Grid Size: the size of a grid unit.
Detail Settings
- Material: Optional material to use for this texture.
- Wind Texture: If the material has a texture labled _WindTex you can set it here.
- Z Offset: The offset in the z direction relative to the Terrain2D object. The Sorting Layer and Sorting Order of the details are all the same so you can additionally sort by z here.
- Floating Isolevel Cutoff: If the isolevel is below this value the detail is considered to be floating and will be removed. The terrain edges are where the isolevel is at a value of 0.5.
Curve Mesh 2D
You can add a curved mesh by selecting GameObject > 2D Object > Curve Mesh. Once created you need to select a Sprite in the inspector, and choose a suitable UV type. If you choose Horizontal Repeat or Vertical Repeat you will need to choose a sprite with the wrap mode set to repeat in the Texture Import settings. To do this set the texture type to advanced, wrap mode to repeat, and sprite mode to single.
You can choose the modes Curve With Tangents, Simple Curve, and Poly Line. In the Scene View with the object selected you can edit the curve by moving the points around, and you can scale the size of each point.
Wind Zone 2D
You can add a Wind Zone 2D to any GameObject by selecting Add Component > 2D > Wind Zone. At least one wind zone is required for any wind effects. You can have one directional Wind Zone in a scene at a time, and up to 3 different Spherical wind zones at a time.
You can sample the global wind vector in script by calling WindZone.SampleWind() or WindZone.SampleWindTurbulence().
You can also add a lifespan to the WindZone2D object, and modify the strength and radius of the wind over the lifetime using Animation Curves. This is useful for effects like explosions.
Adding Wind to Sprites
For a simple wind effect you can use the Waving Sprite shader found in 2D > Waving Sprite. The wind amount per vertex is based on the vertical UV coordinates so it probably won't look as good if you have multiple sprites in the same texture, unless they are all arranged in one row. You can also choose the Flip Pivot option which will make the top stay still and the bottom wave in the wind as opposed to the other way around.
If you need more control you can use the Waving Detail shader found in 2D > Waving Detail. This shader requires an extra wind texture. The wind textures red channel describes how much that part of the sprite can move horizontally, and the green channel describes how much that part can move vertically. The blue and alpha channels are unused. This shader is designed for use with the terrain details but also works with sprites packed in to one texture. To use it with sprites create a material with a wind texture for the whole sprite sheet and set the Sprite Renderers material to that material.
Adding Wind to Particles
You can add wind to a Particle System by adding a ParticleWind2D component found in Component > 2D > Particle Wind. You can choose the wind multiplyer and the max speed, which is the maximum speed that the particle can be traveling in the direction of the wind and still be affected. You will need to be in play mode to see any of the effects.
Parallax Backgrounds
You can turn any Game Object (Including Terrain2D) in to a Parallax Background by adding the Parallax Background component to it found in Component > 2D > Parallax Background. Once created you can choose a distance which can be negative for foreground or positive for background.
In the Scene View you will see a red line, which points to where the Game Object would be positioned if being viewed from the Scene View camera. To preview the parallax background without having to go to playmode you can click on Preview or Preview All in the inspector. This will move the object in to the correct position as if viewed from the Scene View camera.
If the Parallax Background component is added to a Sprite you can tile the background in the x or y directions. This will automatically draw extra meshes either side of the background and reposition them when they are too far from the camera. You can choose the Tile X Amount and Tile Y Amount which is the amount of extra sprites to draw each side.
Modifying terrain in game
To access any of the classes used in 2D TerrainZone you must include the following line of code at the top of your script file.
using TerrainZone2D;
To modify the terrain in game you can call the method:
StampBrush(
	Texture2D brush,
	int textureIndex,
	Vector2 worldPos,
	float radius,
	float strength,
	float angle,
	StampType stampType
  )
or if you don't want to use a texture for the brush you can call
StampCircle(
	int textureIndex,
	Vector2 worldPos,
	float radius,
	float strength,
	StampType stampType
	)
the stamp type can be one of the following:
- Stamp: Adds terrain.
- Erase: Removes terrain.
- Texture: Adds texture to the exsisting terrain.
- Add Detail: Adds details. In this case textureIndex is the detail index.
- Remove Detail: Removes any details.
Once you are done with all modifications you will need to update the mesh and colliders, and if there is any details you will want to clear any floating details.
This is done using the following methods:
UpdateMesh();
UpdateColliders();
ClearFloatingDetails();
UpdateMesh needs to be called before UpdateColliders. As an alternative to ClearFloatingDetails you can call ClearAndGetFloatingDetails() which will return some data about any details that got removed.
Other useful methods include:
StampBrushLine(
  Texture2D brush,
  int textureIndex,
  Vector2 startPos,
  float startRadius,
  float startStrength,
  float startAngle,
  Vector2 endPos,
  float endRadius,
  float endStrength,
  float endAngle,
  StampType stampType
  )
StampCircleLine(
  int textureIndex,
  Vector2 startPos,
  float startRadius,
  float startStrength,
  float startAngle,
  Vector2 endPos,
  float endRadius,
  float endStrength,
  float endAngle,
  StampType stampType
  )
StampCurve(
  Curve2D curve,
  int textureIndex,
  float strength,
  StampType stampType
  )
In game terrain editor
If you want to create an in game terrain editor with similar functionality to the one in the Unity Editor you can add the Terrain2DInGameEditor to your scene by selecting GameObject > UI > Terrain2D In Game Editor.
If you don't like the default layout for the UI you can change it to suit your needs. Any or all of the UI elements that are a child of the terrain edit panel can be deleted and the in game editing will still work with whatever settings were last used with the terrain in the Unity Editor. If you want to set up your own UI the UI Events have access to the following settings found in Terrain2DInGameEditor:
- Terrain
- Selected Texture
- Selected Brush
- Brush Strength
- Brush Size
- Brush Angle
- Selected Detail
- Tool
- Tool Number
- Continuous Stroke
- Continuous Collider Update
The in game editor only uses the tools TerrainPaint, TexturePaint, and DetailPaint. Tool Number is a handy way of changing the tool using just a number so it can be used with a Dropdown UI object. With the tool number 0 = TerrainPaint, 1 = TexturePaint, and 2 = DetailPaint.
To set up brush dynamics you need to add the brush dynamics you wish to include in to the Brush Dynamics array in the inspector. You also need to create a Dropdown UI object and put that in Brush Dynamics Dropdown box below the array. There is no need to add any items to the dropdown or any event as this is done automatically.
The Details Dropdown is only used if you want to hide the Dropdown object and only show it if the DetailPaint tool is selected. You will need to set up the Dropdown yourself.
For an example of how a basic in game editor is set up see the example scene.
Saving and Loading terrain in game
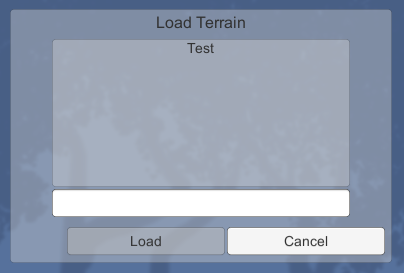
You can easily add an in game save and load panel by selecting GameObject > UI > Terrain2D Save Load Panel. Once created you will need to put at least one Terrain2D object in the terrains array in the inspector of Terrain2D Save Load Panel.
The buttons OpenSaveWindowButton and OpenLoadWindowButton are optional and can be deleted if required. If you aren't using these buttons you can call OpenSavePanel(); or OpenLoadPanel(); from script on the Terrain2D Save Load Panel object.
If you don't want to use the save load panel you can easily make a save file by calling Terrain2D.SaveTerrainData( string path, params Terrain2D[] terrains ) and load a file by calling Terrain2D.LoadTerrainData( string path, params Terrain2D[] terrains ).